Depending
on which version of IOS your device is running, the screens you see may
look slightly different. If you are having difficulty, please call us at (303) 539-9397, and choose option
1 for support.
Step One:
Find
the settings icon, and tap it. It will look something like this:

Step Two:
You should now be inside the settings app. Tap where it says Mail, Contacts, Calendars - like this: 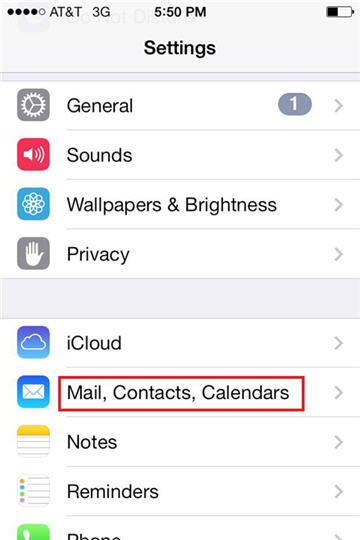
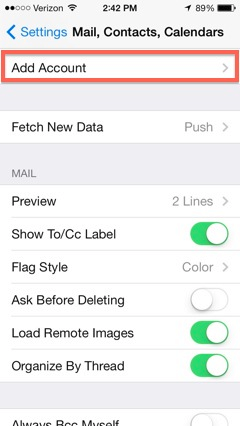
Step Three:
You should now be inside the Mail, Contacts, Calendars settings. Tap where it says Add Account. It will look like this.
Step Four:
You should now be presented with a list of options to select what type of account you want to set up. Tap Exchange. 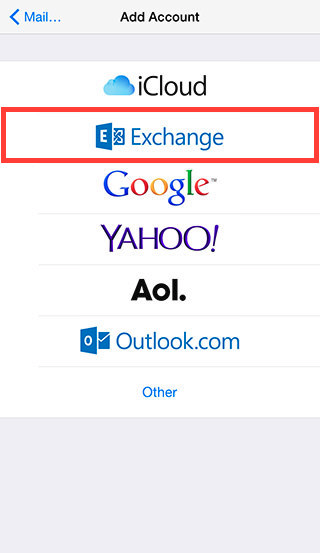
Step Five:
Your
device will now ask you for your email address and password as well as
a description for this account. Please type in your email address
and password. Please note that the password is case sensitive. For
description, you may enter whatever you like to emable you to
distinguish this account from any others that may be on your device.
Once you have entered that information, tap Next. 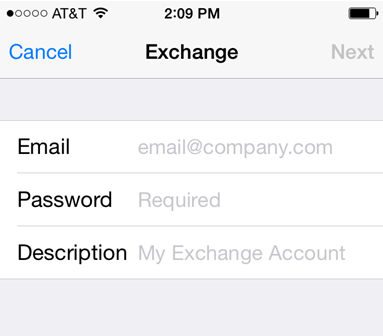
Step Six:
Your device
will atempt to guess the name of the email server where your email is
hosted. It may fail, which is perfectly okay. Once it gives up, it
will allow you to type in the rest of the settings it needs.
For Server, enter: mail.rapidnetworks.biz
For Domain, leave it blank
For Username, enter your username, which is the part of your email address before the @ symbol.
Then tap Save. 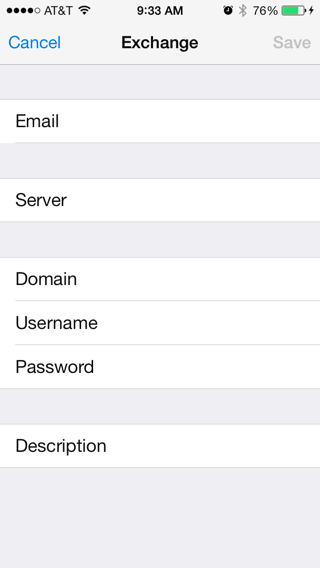
Step Seven:
Your
device should think for a few moments, and then put check marks next to
all of the settings on the screen. This indicates that your account has
been set up successfully. It only displays those check marks briefly,
and then it moves to a new screen, which allows you to choose what
types of data you want to sync with your account.
You can choose whatever options you like. When you are done, tap Save.
Your device will tell you - Account Added, and go back to the list of Email accounts in settings. 
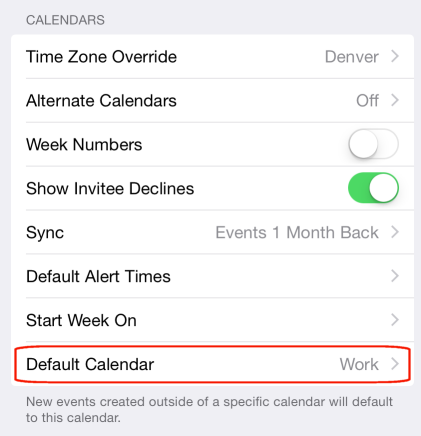
Step Eight:
This step is optional, though recommended. If you want
to make your Exchange calendar the primary calendar used on your IOS
device, scroll down the list of Mail, Contacts, Calendars settings. Tap
on Default Calendar, and choose the calendar associated with the
account you just set up.
Step Nine:
All done. Click your Home button to return to your main screen, and go into the Mail app to use your email account. |
